Before the first example program can be executed on the ATtiny as desired and with the correct timings, the “fuses” must be set correctly in advance. For this I used the free program Microchip Studio for AVR© and SAM Devices in version 7.0.2542. After the installation and the start of the program, the Device Programmer can be called via the menu Tools.
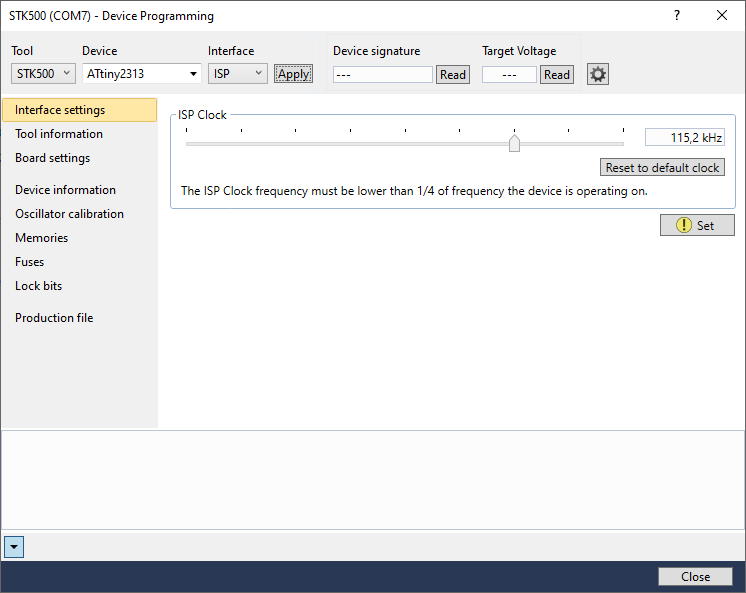
As Tool you select the used ISP Programmer (in my case STK500). Under Device select the ATtiny2313 and click Apply.
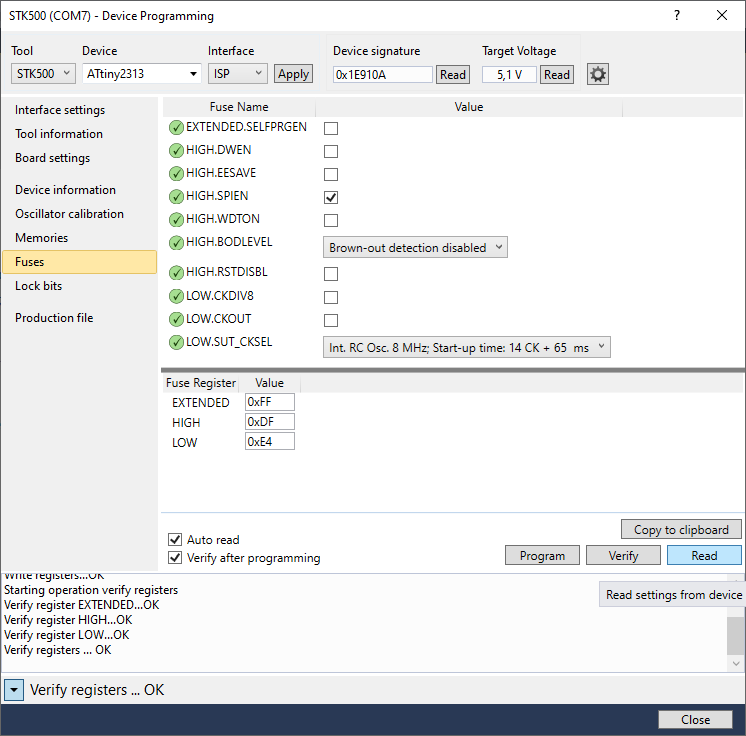
Under the point Fuses (left in the picture) you can set the appropriate fuses relatively comfortably. It is important that the divider (CKDIV8) is not used when using the integrated 8 MHz oscillator, otherwise timing problems will occur. The fuse registers should look like this:
EXTENDED: 0xFF
HIGH:     0xDF
LOW:      0xE4
By clicking on Program the fuses are flashed accordingly.
In PlatformIO the platformio.ini must be adapted accordingly next. To be on the safe side the clock frequency of the ATtiny was also set to 8 MHz (8000000L):
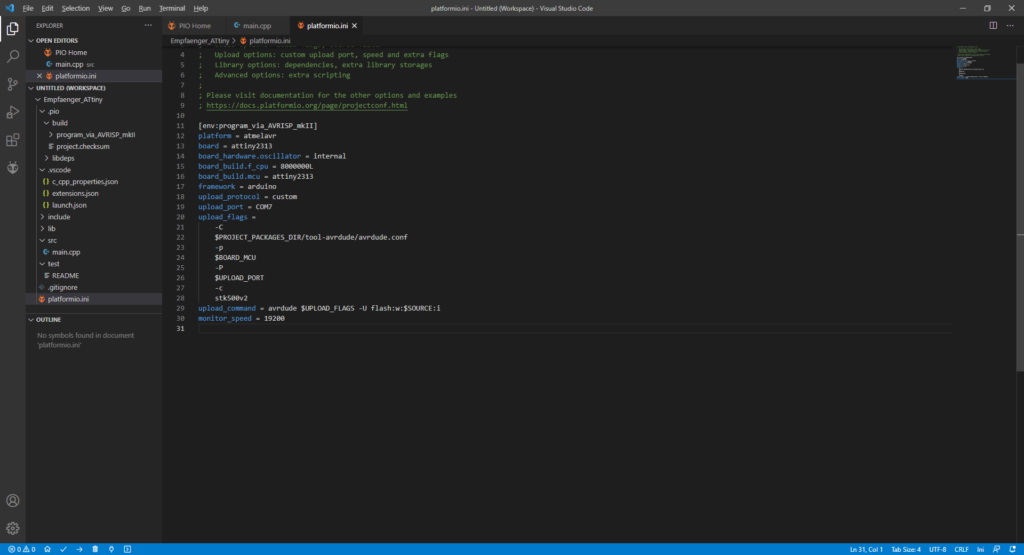
The finished platformio.ini should look like this, with the upload port adjusted accordingly:
[env:program_via_AVRISP_mkII]
platform = atmelavr
board = attiny2313
board_hardware.oscillator = internal
board_build.f_cpu = 8000000L
board_build.mcu = attiny2313
framework = arduino
upload_protocol = custom
upload_port = COM7
upload_flags =
	-C
	$PROJECT_PACKAGES_DIR/tool-avrdude/avrdude.conf
	-p
	$BOARD_MCU
	-P
	$UPLOAD_PORT
	-c
	stk500v2
upload_command = avrdude $UPLOAD_FLAGS -U flash:w:$SOURCE:i
monitor_speed = 19200
The following example program is an extended variant of the classic “Blink” program. Here the runtime of the ATtiny is additionally queried via a serial interface. You have to take care that you don’t use the “regular” serial interface, because the Serial.println() function causes a crash of the ATtiny when transmitting a number (e.g. Serial.println(5)). This realization cost me 2 evenings of research. If you use SoftwareSerial.h for a virtual serial port, numbers can be transmitted without problems e.g. via a FTDI breakout board to a serial monitor.
#include <Arduino.h>
#include <ATTinyCore.h>
#include <SoftwareSerial.h>

unsigned long time_now = 0;
bool zustand = LOW;

SoftwareSerial geraet(0,1); //Rx, Tx

void setup() {
  geraet.begin(19200);
  pinMode(7,OUTPUT);
}

void loop() {
  if (millis() >= time_now + 1000) {
    time_now = millis();
    geraet.println(time_now);
    if (zustand == LOW) {
      zustand = HIGH;
      digitalWrite(7, HIGH);
    } else {
      zustand = LOW;
      digitalWrite(7, LOW);
    }
  }
}